11 Plantar Fasciitis Exercises Your Achy Feet Are Begging For
September 2, 2025
Tight. Achy. Sharp. Stabbing. There are lots of unpleasant terms that describe pain on the bottom of your foot. Luckily, plantar fasciitis exercises can go a long way in relieving that discomfort. In fact, strength moves and stretches are a really effective way to treat this common condition, making at-home relief a reality.
It sucks to have PF, but if you’ve been plagued by it, you’re definitely not alone: Millions of Americans wrestle with heel pain every year, and plantar fasciitis is the most common cause. We tapped a physical therapist and a podiatrist for a primer on all things plantar fasciitis, including what it is, what causes it, and most crucially, what specific exercises can bring you—and your barking tootsies—a much-deserved break.
So what even is plantar fasciitis, and what causes it?
First, let’s start with the plantar fascia: It’s a band of tissue on the bottom of your foot that extends from the heel all the way up to your toes, splaying out as it reaches the top, Winnie Yu, PT, DPT, CSCS, a NYC-based physical therapist and strength coach at Bespoke Physical Therapy, tells SELF. The plantar fascia helps absorb shock when you walk, run, and perform high-impact activities like jumping. It also supports the arch of the foot, though that’s not its primary job, Dr. Yu explains.
So what is plantar fasciitis? Well, it’s when this tissue gets overloaded and becomes inflamed and painful as a result. You can stress your fascia by doing too much exercise on your forefoot, Stephen M. Pribut, DPM., a Washington DC–based podiatrist and affiliated faculty with the biomedical engineering department at George Washington University, tells SELF. Think: jumping jacks, hill sprints, and bounding on a trampoline, since those motions can overload the area, as well as suddenly ramping up a walking or running program without giving your body enough time to recover, he adds.
Tightness in the calves can be another culprit, since that muscle group is attached to your heel, which means extra tension there can yank on the plantar fascia, Dr. Yu explains. Beyond that, running or walking uphill and moving on uneven surfaces can place extra stress on the tissue, and specific foot anatomy can play a role too: Folks with flat feet or high arches can walk in patterns that overload the plantar fascia, as SELF previously reported.
As for how it feels, there’s one often-cited hallmark: “It may start off as a sharp pain that’s present in the first couple steps in the morning,” Dr. Yu explains. From there, it can progress to pain felt every time you get up after being sedentary for a while. And in severe cases, it can hurt every time you take a step, causing you to limp when you walk, Dr. Pribut says.
What’s the best way to treat plantar fasciitis?
When you have plantar fasciitis, the bottom of your foot often feels suuuper tight. “Your natural inclination is to want to stretch it because it feels so freaking restricted,” Dr. Yu says. That reaction isn’t wrong—in fact, stretching your calves, as well as the tissue itself, “is very beneficial,” Dr. Yu says. That’s because by easing tightness in and around the plantar fascia, you can reduce stress on the tissue. However, stretching is not the only approach.
Strength exercises are also key. Specifically, bolstering the strength of muscles in your feet and lower legs—including the foot intrinsic muscles, calves, tibialis posterior, tibialis anterior, and peroneals—can cause these areas to absorb more shock as you move and ultimately reduce how much load is placed on the plantar fascia, Dr. Yu says. Basically, by strengthening the muscles that surround the plantar fascia, you can take tension off the tissue itself, Dr. Pribut says.
In many cases, doing strength and stretching exercises can help resolve plantar fasciitis, sometimes in a matter of just a few weeks, Dr. Pribut says, though the healing timeline depends on the severity of the PF.
But sometimes, more intervention may be needed, and you may benefit from other treatment approaches too. Dr. Pribut advises seeing a medical professional if you have bottom-of-the-foot pain that’s causing you to limp, otherwise interfering with walking, or forcing you to decrease your activity. “Don’t ignore the pain forever,” he says. Instead, go see a doctor “and get some useful professional advice.”
Here are some plantar fasciitis exercises to try.
Looking for at-home relief? These moves, from Dr. Yu, can help seriously soothe your aching feet.
How to use these exercises: Start with the stretches (moves 1 and 2), doing them first thing in the morning as well as sprinkled throughout the day when you have time. Depending on the severity of your plantar fasciitis, the stretches may be all you need to resolve your pain. Ideally though, once your pain has calmed down a bit and you can comfortably tolerate light resistance training, you’d also incorporate strength exercises (moves 3 to 11) to prevent plantar fasciitis from returning. Dr. Yu suggests doing strength exercises 2 to 3 times a week.
-
Katie Thompson
1. Bent-Leg Calf Stretch
- Start in a staggered position with your left leg several feet in front of your right leg. Bend your left knee and hinge forward slightly so most of your weight rests on your left leg. Plant your right firmly on the ground.
- Softly bend your right knee to feel a stretch in the lower part of the right calf. Hold for 30 seconds, then switch sides. Repeat for 3 total rounds.
This stretch targets the soleus, your lower calf muscle, which you target with the bent-knee positioning. Tightness there can contribute to plantar fasciitis by limiting how much shock those muscles are able to absorb when you walk or run; that shock can then get redirected to the plantar fascia. By loosening tight calves, you can reduce stress placed on the plantar fascia. To complement this move, after you’ve done reps and sets on a bent leg, do a straight leg calf stretch where you get into the same positioning but keep the back leg straight. That will target the gastrocnemius, your upper calf muscle.
-
Katie Thompson
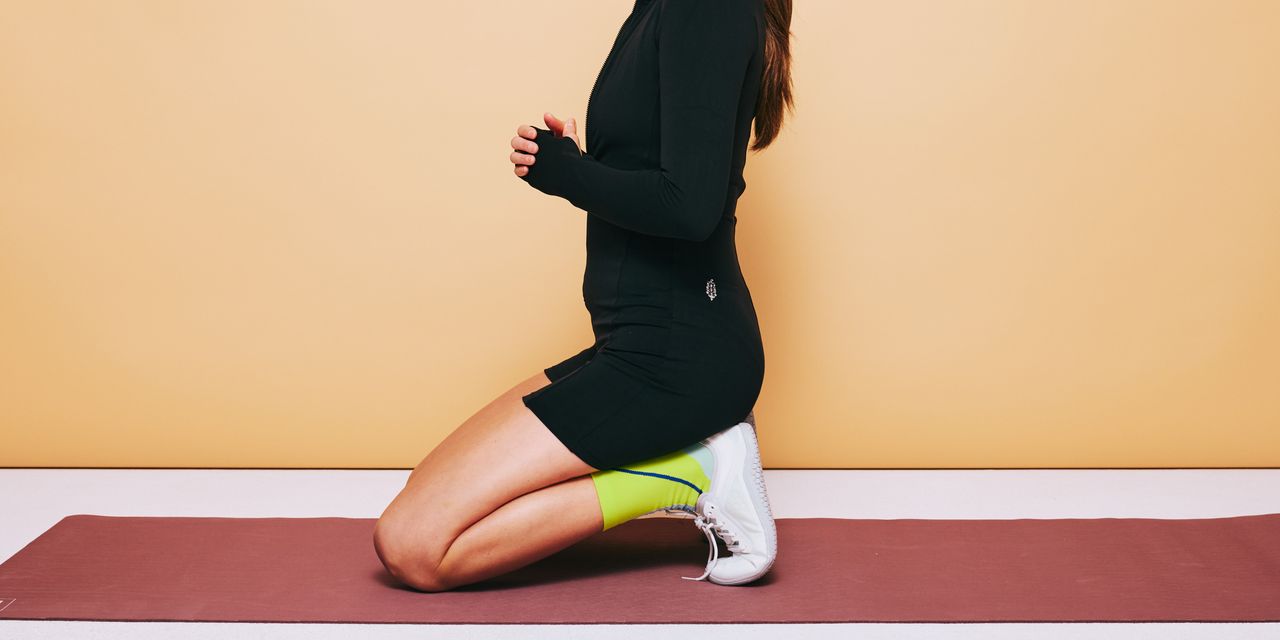
2. Kneeling Plantar Fascia Stretch
- Get into an all-fours (quadruped) position with toes tucked underneath you. Slowly walk your hands up to come into a tall kneeling position and sit your butt on your heels. You should feel a deep stretch along the plantar fascia.
- Hold for 10 to 15 seconds, and repeat for 3 to 4 rounds. (You can start with just 1 to 2 rounds, if this is an intense stretch for you.)
- Over time, work your way up to a 20- to 30-second hold.
Here you’re stretching the plantar fascia itself, using the tucked under toe positioning and the weight of your butt on your heels to lengthen out the tissue. If you have a more severe case of plantar fasciitis, this move may feel too intense for you; modify it by pushing your butt back onto your heels but keeping both hands on the ground.
-
Katie Thompson
3. Alternating Toe Raise
- From a seated position, place both feet on the ground.
- Lift your big toes off the ground while keeping the rest of your toes down. Pause for a moment, then switch: Place your big toes on the ground while lifting up all the others. Again, pause for a moment. This is 1 rep.
- Continue this pattern, alternating which toes are lifted, for 10 reps. Repeat for 2 to 3 total rounds.
Also known as toe yoga, this exercise is more challenging than it looks. “Most people will find it rather difficult if they’ve never done this before, and they may need to use their hand to hold the four toes down as they’re lifting their big toe,” Dr. Yu says. It’s okay to give yourself that assist, she says, adding that after several sets of this, it will likely feel easier to do on your own. This move helps boost the mobility of your foot and toe muscles, which can help the plantar fascia be more pliable, reducing pain there, she explains. If this move starts to feel easy, perform it standing for a greater challenge.
-
Katie Thompson
4. Foot Doming
- From a seated position, rest both feet on the ground.
- Press into your big toe and activate your foot muscles to lift your arches up. Don’t scrunch the rest of your toes; instead, keep them relaxed while making sure they maintain contact with the ground. Hold for a moment, then rest both feet on the ground again. That’s 1 rep.
- Do 10 to 12 reps. Repeat for 2 to 3 total rounds.
This exercise helps activate your posterior tibialis (a lower leg muscle) and foot intrinsic muscles, which help create stability on the bottom of the foot and absorb shock as you walk and run. By strengthening these players, you can reduce stress placed on the plantar fascia. Once this exercise feels easy, do it standing to up the intensity.
-
Katie Thompson
5. Banded Foot Doming
- Loop a resistance band around the middle of your feet.
- Press into your big toe and activate your foot muscles to lift your arches up. Don’t scrunch the rest of your toes; instead, keep them relaxed while making sure they maintain contact with the ground. Hold for a moment, then rest both feet on the ground again. That’s 1 rep.
- Do 10 to 12 reps. Repeat for 2 to 3 total rounds.
This is a more challenging variation of the above exercise. Progress to it once foot doming from a standing position starts to feet easy.
-
Katie Thompson
6. Banded Lateral Walk for Plantar Fasciitis
- From a standing position, loop a resistance band around the middle of your feet and place both feet on the ground. Perform the foot doming described above: Press into your big toe and activate your foot muscles to lift your arches up. Keep the rest of your toes on the ground, but don’t scrunch them.
- From here, take five to 10 side steps to the left, then repeat with 5 to 10 on the right. Maintain the dome along the bottom of your foot the entire time.
- Complete 2 to 3 total rounds.
This is a dynamic variation of the banded foot doming exercise. Here you’re challenging your foot intrinsic muscles to stay activated and stabilize your arches as you step side to side.
-
Katie Thompson
7. Seated Bent-Knee Calf Raise
- Sit on a bench or chair that’s at a height where your thigh is approximately parallel to the ground. (A little higher is fine). Place a weight on the edge of your right thigh, close to your knee but not directly on the joint. This is the starting position.
- Press evenly through your big toe and pinky as you lift your right heel off the ground, going as high as you can while still keeping weight in your forefoot (instead of placing all your weight in your toes). Hold for a second at the top, then lower back down. That’s 1 rep.
- Do 8 to 12 reps. Repeat for 2 to 4 total rounds.
This exercise helps strengthen the soleus, which can reduce stress placed on the plantar fascia. Start with just your bodyweight and add the weight only once you can do that movement comfortably and without pain. Use 10 to 15 pounds at first, then gradually increase the weight. In lieu of a dumbbell, you can use a weight plate instead, which is “a little bit easier to control,” Dr. Yu says.
-
Katie Thompson
8. Standing Bent-Leg Calf Raise
- Stand tall with feet hip distance apart. Bend your knees slightly and push your butt slightly back. Place both hands on your waist, as shown, or lightly rest them on a wall or chair if you need balance support. This is the starting position.
- Pressing evenly through your big toe and pinky, raise both heels up, going as high as you can while still keeping weight in your forefoot (instead of placing all your weight in your toes). Hold for a second at the top, then lower down to the starting position.
- This is 1 rep. Do 8 to 12 reps. Repeat for 2 to 4 total rounds.
This exercise also targets the soleus. The standing position makes it more challenging than the seated exercise above. Once this move feels easy, hold weights in each hand to increase the intensity.
-
Katie Thompson
9. Standing Calf Raise
- Stand tall with feet hip distance apart, legs straight. Place both hands on your waist, as shown, or lightly rest them on a wall or chair if you need balance support.
- Pressing evenly through your big toe and pinky, raise both heels up, going as high as you can while still keeping weight in your forefoot (instead of placing all your weight in your toes). Hold for a second at the top, then lower down to the starting position.
- That’s 1 rep. Do 8 to 12 reps. Complete 2 to 4 total rounds.
Here you’re strengthening the gastrocnemius. Try not to rock your body forward or backward as you complete your reps, since that can take some of the work off your calves and cause your trunk to compensate, Dr. Yu says. Instead, focus on moving straight up and down.
-
Katie Thompson
10. Bodyweight Single-Leg Calf Raise
- Stand tall with both feet on the ground, hands clasped together in front of your chest, as shown, or lightly resting on a wall or chair for balance support. Bend your right knee slightly and lift your right foot off the ground. This is the starting position.
- Pressing evenly through your big toe and pinky on your left leg, lift your left heel off the ground, going as high as you can while still maintaining weight in your forefoot (instead of placing all your weight in your toes). Hold for a second at the top position, then lower back to the starting position.
- That’s 1 rep.
- Do 8 to 12 reps, then switch sides and repeat. Complete 2 to 3 sets to start, then work your way up to 3 to 4 sets.
Here you’re working your calves, ankles, and foot intrinsic muscles. These muscles help absorb shock when you walk or run, so the “the stronger they are, the less stress is going to be placed on that plantar fascia,” Dr. Yu explains.
-
Katie Thompson
11. Dumbbell Single-Leg Calf Raise
- Stand tall with both feet on the ground, and a weight in your left hand. Bend your right knee slightly and lift your right foot off the ground. This is the starting position.
- Pressing evenly through your big toe and pinky on your left leg, lift your left heel off the ground, going as high as you can while still maintaining weight in your forefoot (instead of placing all your weight in your toes). Hold for a second at the top position, then lower back to the starting position.
- That’s 1 rep.
- Do 8 to 12 reps, then switch sides and repeat. Complete 2 to 3 sets to start, then work your way up to 3 to 4 sets.
This weighted single-leg move is the most challenging variation of all the calf raises. Get comfortable with the bodyweight single-leg calf raise before attempting this one, but then when you’re ready, don’t shy away from picking up weights. “I wouldn’t perform just bodyweight for weeks at a time, because you’re going to lose the benefit of it,” as your muscles get used to the challenge, Dr. Yu says.
Demoing the moves above is Winnie Yu, a doctor of physical therapy, certified strength and conditioning specialist, and running specialist.
Related:
- How Bad Is Walking Barefoot Around Your House, Really?
- 6 Common Habits Podiatrists Say Are Wrecking Your Feet
- What Can Happen to Your Feet If You Wear the Same Shoes for Running and Lifting
Get more of SELF’s great fitness content delivered right to your inbox.